Outfit of the Day & Press!

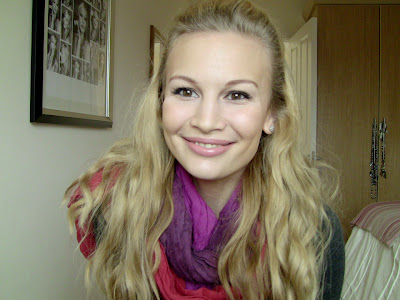
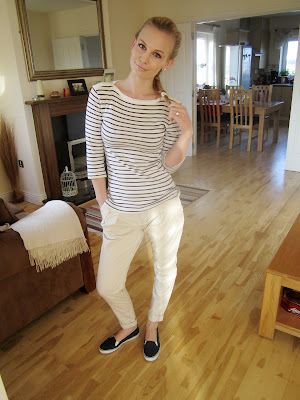
Jacket - Bershka, Cardigan - Promod, Jeans - Zara, Watch - Phosphor Appear, Earrings - Accessorize, Boots - ASOS, Bracelet - Smyth's

We filmed a tutorial on how to get the perfect blog pictures today, which I promised you guys last week.  It includes tips for posing, lighting tricks, angles and also post-production hints & how-to's with Jonathan!  It was so confusing with all the different cameras going...I had my video camera set up filming the whole thing while Jonathan shot me with both the 550D and his little vloggity Canon...the mind boggles.  Hahaha!


This was just us messing around with all the cameras, haha!

Tomorrow we're driving to Dublin for Jonathan's nephew's birthday (he's an April fool!  Haha, joking ;) and then on Saturday we have the meet-up!  I'm so excited & nervous at the same time...I have no idea what to expect!  I'll be sure to take lots of pictures for you guys that can't make it though.  We are taking both Albi & Sina but they won't be at the meet-up because Albi doesn't really like new people all that much (Sina willingly leaps into anyone's arms...haha!) and I don't think he'd feel very comfortable so they will stay at their grandma's house! :)  My only worry is that Sina gets quite car-sick so we'll be taking lots of breaks along the way and we'll probably have to cover the whole back seat with plastic!!  Although someone told me to give her a gingersnap cookie before the journey...apparently that helps with motion sickness!  We shall see!  Sounds interesting!  


I also wanted to let you guys know (especially those of you who live in France!) that I was featured in a French magazine called "Be" this month.  A lot of you tweeted, messaged and emailed me to let me know this so thank you so much if you did!  I tried to reply back to as many people as I could but if I didn't respond to you please know that I really appreciated it!  A lovely subscriber of mine, Iolanda very kindly sent me a PDF of the article and has even offered to send the colour copy to my PO Box.  Thank you so much, Iolanda!!  It means so much to me :)  

Stay Stylish!
xoxo


Follow my blog with bloglovin

March Fashion Favourites!


Watch the video here
I can't believe March is already over!  This month was surprisingly warm (I even sunbathed on my balcony two or three days in a row...which is unheard of this time of year!!)  so these outfits feature a couple of lighter fabrics and pieces.  There were three "fashion favourites" this month.  Here they are: 

Jacket - Zara, Shirt - Kookai, Jeans - Miss Anna, Boots - Faith, Belt - Vero Moda

Pants - Primark, Boots - Dune, Tank Top - Primark, Cardigan - Farrell & Brown

Leggings - Vero Moda, Boots - ASOS, Blazer - ASOS, Tank Tops - ASOS/InWear, Bag - ASOS, Scarf - Mexx

Layering: I do a lot of layering in the spring, because it's generally too cool to wear just one tank top or light blouse on its own so I like to layer to keep warm!  

Top - Bien Bleu, Scarf - Esprit, Jeans - Zara, Boots - ASOS, Bag - Chloe

Jacket - FCUK, Jeans - Zara, Top - Zara, Scarf - Zara, Boots - ASOS

Scarves: Another absolute must-have for my spring wardrobe is a scarf.  Scarves are perfect for adding a pop of colour or a certain unique feel to a simple look.  They're also really great for helping you transition between those cool spring months when you need to keep warm but not TOO bundled up!

Boots: This one is pretty obvious.  It's still far too chilly for ballet pumps/flats so I wore boots all month long! 

Let me know what your March Fashion Favourites were and which outfit you like best! :)

Stay Stylish!
xoxo


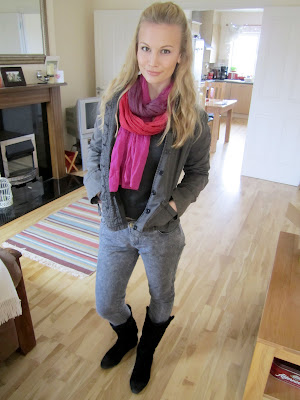
Pop of Colour

Jacket - FCUK, Jeans - Zara, Top - Zara, Boots - ASOS, Scarf - Zara, Watch - Phosphor Appear (win one here!)

I still remember when my parents bought me this charcoal jacket waaaay back when French Connection didn't even exist in Cork and there were only a few pieces in Brown Thomas (Irish department store).  My dad insisted on getting me this jacket even though it was 2 sizes too big for me...hahaha!  They didn't have my size but he loved it so much he just got it anyway...thankfully it's not huge on me and I'm still able to wear it!  I remember they bought me two things, the jacket and a stripy blue & white A-line skirt.  My dad loved shopping for clothes with us!  

I actually bought this scarf in Zara two years ago when I was first making videos on YouTube.  I remember it so well because it was when I was living in the UK but came back to Ireland at Easter break to visit!  I love the colours in this scarf...it fades from pink to purple to red.  This is how I love to wear it, with a really simple outfit/colours like grey!  I like how it adds a pop of colour to an otherwise all-grey/black outfit.  


With my babies <3 
Sorry about the midriff on display...that wasn't intentional and I hate when that happens!  But my trusty photographer failed to bring that to my attention so...there you go.  :)


I actually French braided my hair last night and slept on it...this was the effect the following morning!  I quite like it and the best thing about it is there's no heat involved!  A few people have commented on how I never wear my hair "wavy" anymore and that I always straighten it.  I actually haven't been straightening it at all...the way my hair is, the longer it gets the straighter it becomes.  You can see this quite clearly from photos!  When I had short hair it was really curly, mid-length is wavy and long is always a lot straighter.  So really all I've been doing is washing, blow-drying and brushing it out.  I do this every 3 days so I rarely use heat on my hair.  If I style it with my GHD or curling iron it's only for special occasions :)  I'm trying to get it as healthy as possible so that I can keep growing it out for my wedding!

I also filmed a quick video announcing my meet-up on Saturday so if you're interested you can check that out here :)

Stay Stylish!
xoxo

Swarovski Crystal Phosphor Appear Watch Giveaway!


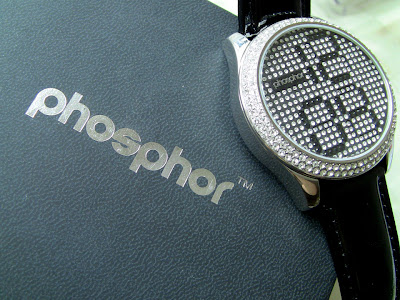
You may have already noticed if you watch the daily vlogs that my fiancé and I recently received matching Swarovski crystal watches!  They are the brand spanking new (they literally only launched this month) Phosphor Appear watches and I am so in love with them!


Fierce.
This has a unique Micro Magnetic Mechanical (M3D) display with Swarovski crystals both around the face and on the inside of the actual watch.  It works with an electro-magnetic pulse and makes a really cool whirring sound everytime the numbers change.  


I picked the black women's watch, but they also come in red, white and pink!  The women's watches all come with patent leather straps and crystals around the face.  There is also a seconds function and an off-button, which basically hides the time and creates a face entirely full of crystals.  


This is definitely a great piece for those of you that like big, statement watches and aren't afraid to flash some bling :)  I picked black because it was the most practical for me and it goes with absolutely anything I will wear!


Here is the Phosphor Appear in red.  You can see the numbers are shown with red crystals and it has a red patent strap.  I'm giving this to my sister! :)


And here is Jonathan's watch, the men's one.  I think this is so great because it's understated, and a little bit more masculine but it's still got a lot of sparkle!  The strap is matte leather and there are no crystals on around the face, instead it's a matte black.


Here are the three watches altogether.  The women's watches are $249 and the men's are $199, available from the Phosphor website!

Now for the fun part...Phosphor were super generous and kind enough to let me host a giveaway just for you guys on my YouTube channel!  I am going to be giving away one of these watches in a colour of your choice!  All you need to do is click on this link which will take you to the selection of watches on the Phosphor website.  Then simply leave a comment under my giveaway video telling me which colour you would like to win!  That's it!  The contest is open internationally and ends next Monday April 4th :)  


You do need to be a subscriber of my YouTube channel to win, so please subscribe if you haven't already!

Good Luck!
xoxo


Disclaimer: Phosphor Appear watches were sent to me for consideration to review.  I was not paid for my review nor am I affiliated with the company in anyway.  My 100% honest opinion, as always :) 

Dublin Meet-Up April 2nd 2011!


Watch today's video here! :)

Today we had a lovely lunch in Blackrock Castle with my family and Annika, our German friend who is visiting for the weekend!  Unfortunately it wasn't sunny enough to eat outside so the puppies stayed home :(  I got a yummy fried brie salad with candied walnuts and Erika & Jonathan got fish and chips!  

This is my little princess Sina right after losing her very first baby tooth!  Aww...  She's growing up so fast!  I found her munching on something in the bed this morning and of course my initial thoughts were "my diamond earring!!" but when I reached into her mouth and pulled something out I quickly realised it was her pearly white tooth!  (My diamond earring is still missing...but I KNOW she took it :-/) 

Anyhow...the real reason I'm writing this is to bring you all some very exciting news!  Jonathan, Albi, Sina & I are driving to Dublin next weekend for Jonathan's godson's 2nd birthday (Friday) and since before we moved to Cork I've been getting numerous requests to do some kind of a meet-up.  We both thought what better time to do this than next weekend and especially in Dublin because it's more fair for everybody living in Ireland!  We have created an event on Facebook...if you're a friend of mine already on there you will have been invited (Jonathan went through almost 3,000 people individually inviting them to the event, hahaha!  It took him all afternooon!) but anyone is free to come.  Check out our Facebook Meet-Up Page here!  And please let us know if you can make it, we would love to meet you! :)

Stay Stylish!
xoxo


How I Edit My Blog Pictures (Photoshop Tutorial)


I received a couple of requests to do a post on how I edit my blog pictures.  I really don't do a whole lot but I feel like it's the smaller "tweaks" that make a picture look better.  You definitely don't want to go overboard, otherwise the pictures won't look natural.  Above is a picture from Wednesday's set that you haven't seen yet.  On the left is the "before" shot and on the right is the "after".  You can see how the colours are popping in the after shot, it's brighter, more vibrant and if you click on it close-up you will see that it actually gives the illusion of a flawless complexion. (Hehehe... ;)  Whereas the before shot is a little bit duller and the colours don't show up as well.  Here's exactly how I achieve this using Photoshop CS3.

(Click on any image to make it bigger!)


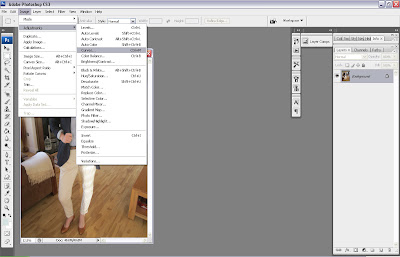
Step 1 - Curves
Adjusting the curves is what will brighten up the picture.  To open them up go to Image, then Adjustments and select Curves.


This will open up a little box with a graph on it.  These are the curves of the photo.  You can move the line to adjust the lighting of the picture.


You can see from this picture exactly how far and in what direction I moved the curves line.  I usually move it up and to the right a little bit, to achieve a brighter and lighter effect.


Step 2 - Levels
The levels are what I use to intensify the colours a little bit.  To open them up, hit Image, Adjustments and then select Levels.


This will open up another box which shows you the levels of the picture.  This is similar to curves in that you can move the little arrows up and down the graph to adjust the colours and lighting of the picture.


Here you can see that I moved the left arrow up from zero to twenty-eight.  As soon as you move the left arrow up the scale you will see the colours in your picture intensify.  The farther up you go the darker the picture will become so you don't want it too dark.  Just until the colours "pop".


Step 3 - Save for Web
It's important that you save the image for web.  This ensures the best quality for viewing online (like on a blog!).  Depending on the camera you've used, you will probably have to make the image smaller as well.  This is very easy to do, you just hit Ctrl+Alt+I and change the image to whatever size you need.  I usually make mine about 1200 pixels in width.  To save for web, simply go to File and then select Save for Web!


This will bring up a large window like this where you can see more clearly the effect the adjustments you've made have had on the quality of your picture.  You can see here that it is brighter and my skin looks clearer.  Also the colours are more vibrant!  If you're happy with your work, just hit Save.


And that's it!  Above are the before and after shots in full so you can see the difference between them.  I love using this method because I feel it improves the quality of my overall blog as good pictures are really what count!  I don't recommend airbrushing or touching up blog pictures, because I think this makes them look really fake and unrealistic!

Hopefully this will help you if you're a blogger also or even if you just want to print some of your favourite pictures and would like them to look their best!  I will be making a full video tutorial with my fiancé on how to take the optimal pictures for your blog which will cover lighting, camera quality, posing, angles, backdrop and editing/post production as well.  This is what Jonathan is trained in professionally (not me!) so he has a lot of knowledge to share!  The video will be up next week, but in the meantime you have any other questions on this subject just leave me a comment or ask me on Formspring and I'll be happy to help you out! :)

Stay Stylish!
xoxo


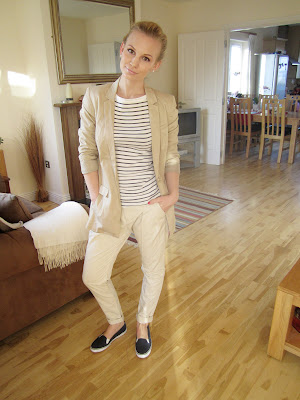
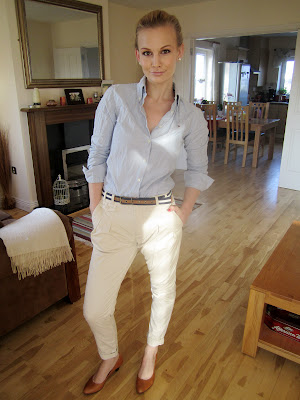
How To Wear Chinos!

Chinos - Zara, Top - GAP, Shoes - New Look, Blazer - Vero Moda, Bag - Joop!

Watch the video here! :)

A lot of you requested I do a blog post/video on how I would style my chinos for spring and summer...so here it is!  I came up with two different outfits - one is more casual and laid back, the other is a little bit more formal and elegant.  Both of them are perfect for summer as the fabrics are lightweight cottons and chinos are quite loose-fitting and relaxed.  The style is very classic and preppy so I stuck with that look in both outfits.  

Outfit 1 would work for school or college and is a pretty casual laid back daytime look.  The nautical stripes and boat shoes give it a summery feel and I think the leather satchel suits this outfit better than a purse or handbag.  If you want to take things up a notch, I would just pair it with a light boyfriend blazer.  The boyfriend blazer is more relaxed than a traditional tailored one and still ties in with the casual feel of the look yet makes it a little more put-together!

Chinos - Zara, Shirt - Tommy Hilfiger, Shoes - Giorgio Picino, Blazer - Zara, Bag - Chloe

Outfit 2 is definitely more elegant and I would wear this to work, to a meeting and even a formal lunch.  This time I tucked the shirt into the pants to showcase the beautiful belt they come with!  I paired it up with some of my favourite brown leather mid-heels that actually unintentionally ended up matching the belt.  Then, to dress it up a bit I layered over a classic navy blue blazer and with this I would carry my Chloe Paddington for a more elegant style.  I kept jewellery minimal and very simple, only opting for some crystal stud earrings.

My tips for styling chinos are to keep it classic, go for clean lines and don't over-dress.  Chinos are pretty casual anyway so you definitely don't want to go OTT.  I also recommend staying away from black when wearing this style of pants only because it's more of a winter colour and doesn't really suit the summery style.  I would go with lighter colours like white, navy, tan and pastels.  I hope these tips will help you figure out what to put with your chinos this season! 

Stay Stylish!
xoxo


Custom Blog Design by pipdig